By Steve Immerman
First published in Glass Craftsman, Issue No. 212, Feb/Mar 2009.
Introduction
When designing with kiln formed glass, artists often wish to cut pre-fused pieces of glass (such as pattern bars or a pot melt) in to smaller pieces. Although some artists are able to successfully cut and break glass that is thicker than 3mm with just a carbide tipped glass cutter and strong breaking pliers; others of us find this method very difficult and unpredictable. I have found that a successful alternative is to use a tile saw to cut through these thicker glass pieces. This article will discuss how to purchase, set up, and use this excellent tool.
How is a tile saw used?
The tile saw is an extremely versatile tool for cutting straight lines from a thicker piece of glass, but it is not optimal for curves. One significant difference between using a carbide tipped glass cutter and a tile saw is that a tile saw does remove some glass in the process of cutting, as opposed to the carbide cutter which causes the glass to fracture without removal of material. Having the ability to precisely cut thicker glass opens up a huge range of new possibilities for the kilnformer.
Examples include:
Cutting off the rounded edges of fused pieces to create a right angled edge
Cutting pattern bars into slices
Cutting fused pieces and reassembling into new designs
Cutting thick pieces and using the cut edge as the display side
Choosing a Tile Saw
As with any tool there are varying levels of quality in the models of tile saws readily available; and the cost increases as the quality of the tool goes up. The main technical specifications to consider are the size of the blade, the motor size, the quality of the platform upon which the glass moves as it is fed through the blade, and the maximum size project that platform can hold.
It is possible to find tile saws with 7” blades, a ¾ HP motor, and non-moving platforms. These can be fairly inexpensive, and may work for small projects. But, as your work becomes larger and more sophisticated, you may find them inadequate. A saw with a 10” blade, 1 ½ HP motor, and a large moving platform will most likely work for any project you have. A typical choice for many glassworkers is the MK 100 or a saw with similar specifications.
Also, consider whether the saw comes with a stand. Often you can find a package deal including the tile saw and stand. Another consideration would be whether to get a stand on casters so that it can be rolled away as needed. If you will need to move the saw around your studio or working areas this is a great idea, as these saws are very heavy. I found the HTC1000 Universal Mobile Base to work well, but it seems to have been replaced by the HTC PM1000 Mobile Base Kit.
Choosing a Blade
Often a tile saw will come with a blade – but the blade is meant for cutting tile. This is not an optimal blade for cutting glass, and you will want to change this to a lapidary blade. The issues involved with blade selection are related to chipping, accuracy, and material loss. The thicker the blade, the more material is lost. The thinner the blade the more tendency it will have to wander off the straight line you had intended. The coarser the grit on the blade the faster it will cut, but the more chipping it will cause. The finer grit resin bonded blades may cut chip-free, but wear out faster.
One solution to the problem of thin blades wandering off course is to use a “wheel stiffener” which helps to some degree. But, you will still have to decide on which characteristic of the blade is the most important and choose appropriately. For my work I have found that cutting straight and true is most important, and I have ended up using a MK 303 blade, an MK Hot Dog Blade, or a Result Blade; along with a wheel stiffener.
If you do get a tile blade included with your saw purchase, don’t give it away. It is useful if you ever need to cut up ceramic kiln shelves for dams or kiln furniture.
Setting up your tile saw
When using most diamond tools to cut or grind glass, water is involved as a coolant. This protects the diamonds and keeps the glass from overheating and cracking. A tile saw is no different. This is a very messy tool, and you will want to place this somewhere that is either easily cleaned, or that will contain the water spray in a defined area. If you live in a climate where it is feasible to use your saw outside, that is a good solution. If not, you may have to create some sort of enclosure, such as one with PVC pipe, plastic sheeting, and floor coverings to contain the water. And obviously, the saw should be plugged to an appropriate GFCI outlet.
Most tile saws have a tray containing water, and a pump that pumps the water from the tray onto the spinning blade. You will need to fill the tray with water, and periodically empty and clean the tray and replace the water. Having the tool near a water source, and near a place to discard the water containing much particulate matter will make your life easier. If you are going to pour the water down a drain, it is best to have a trap installed to capture the particulate matter so it does not clog your drains.
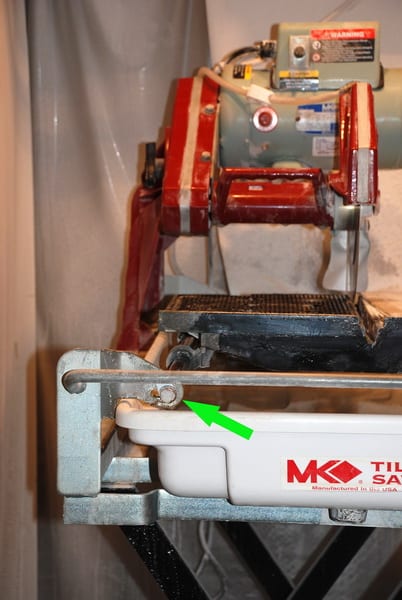
If making precise right angle cuts is important to your work, you need to adjust the angle of the runners that control the moving platform so that it moves perfectly parallel to the blade. You cannot rely that the saw comes with this perfectly aligned, and I’d recommend finding this adjustment, and making sure it is aligned correctly before using the saw. (see green arrow on photo to right).
Safety Issues
Of course, you need to keep your fingers away from the spinning blade. Do not wear any loose clothing, wear ear and eye protectors, and consider wearing an appropriate respirator. I also recommend removing any jewelry that might be damaged by the water spray. Wearing a rubber apron to protect you from the water spray is also highly recommended.
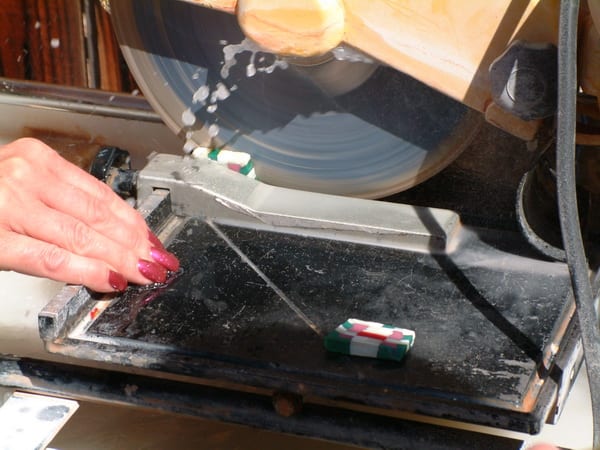
Using the saw
The basic use is quite obvious – you place the glass on the platform and move it through the blade. You will need to adjust the height of the blade so that it will cut all the way through the glass. Always make certain that the pump is working and that a good spray of water is hitting the blade and glass at all times while cutting. Push the glass through the blade slowly to avoid chipping the edges and jamming up the blade. Make sure the glass is well supported so that the cut-off pieces don’t fall off the platform after the cut has been made.
One of the most common problems during the cutting process is the development of a large chip at the very last few millimeters of the cut. This chipping can be minimized by:
moving the glass slowly through the saw
pushing the two sides of the glass together at the very end of the cut
placing something on the surface of the platform to absorb vibrations (such as thick, rubber shelf covering material)
placing a piece of glass next to the end of your cut, so you exit one piece of glass and enter another
Uses for the Tile Saw
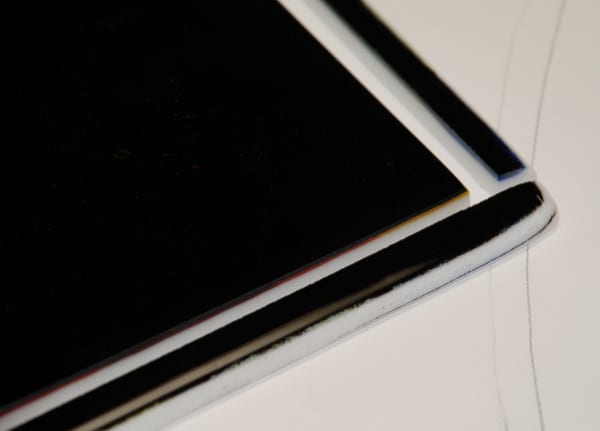
Creating perfect square corners from rounded edges on a fused piece of glass:
The tile saw can quickly make straight, clean edges from a kilnformed piece that did not end up exactly square, or that has rounded corners from the fusing process. Simply use the saw to trim off the rounded edges from the glass, and assure that the corners are square using a metal L-square. You can mark the lines you want to cut using a permanent marker, and protect those lines from washing away under the water spray using paste wax or Chapstick.
Cutting Pattern Bars into slices:
The tile saw is the easiest way to accurately and cleanly cut a Pattern Bar into even slices. Just set up a guide on the platform (you can use a C-clamp to hold the guide in place if your saw didn’t come with an adjustable stop). Adjust the guide to the width you want your Pattern Bar slice to be, and cut through the glass slowly and steadily.
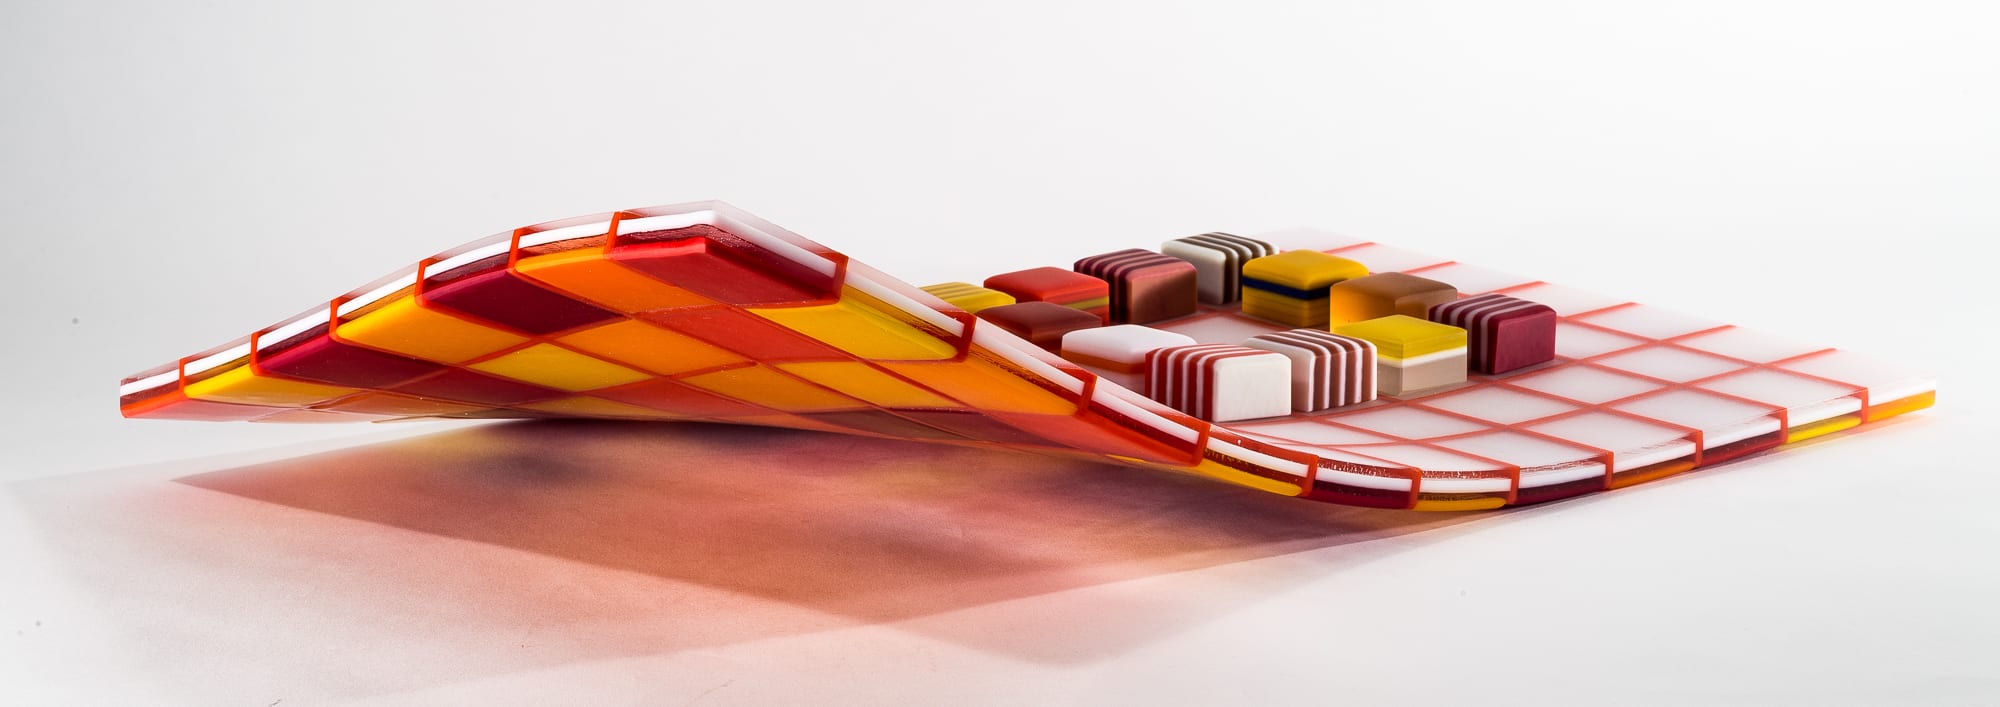
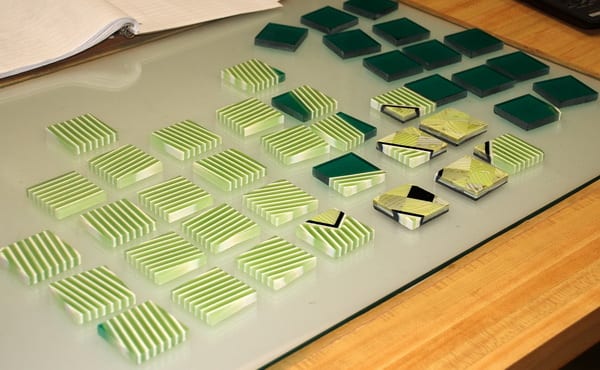
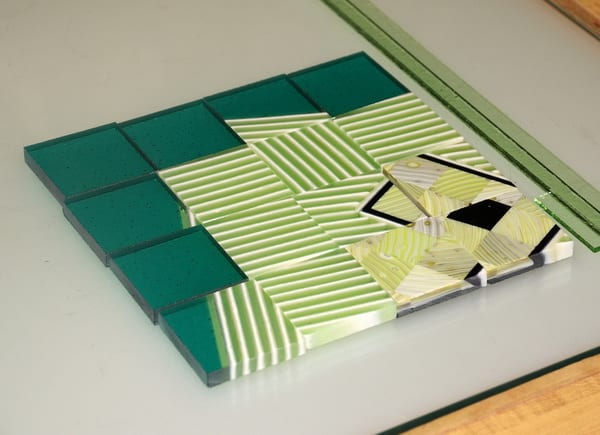
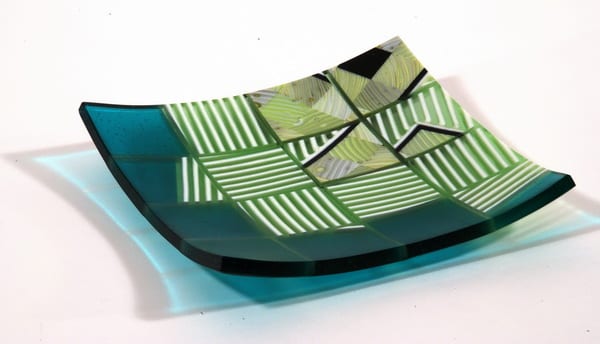
Cutting fused pieces and reassembling them into new designs:
The tile saw makes it easy to cut cleanly and accurately through a prefused piece of glass. Consider making several 1/4 inch thick pieces of patterned glass, then sawing the patterned pieces into shapes that can be tightly fit together to form new patterns in a final piece, as shown below.
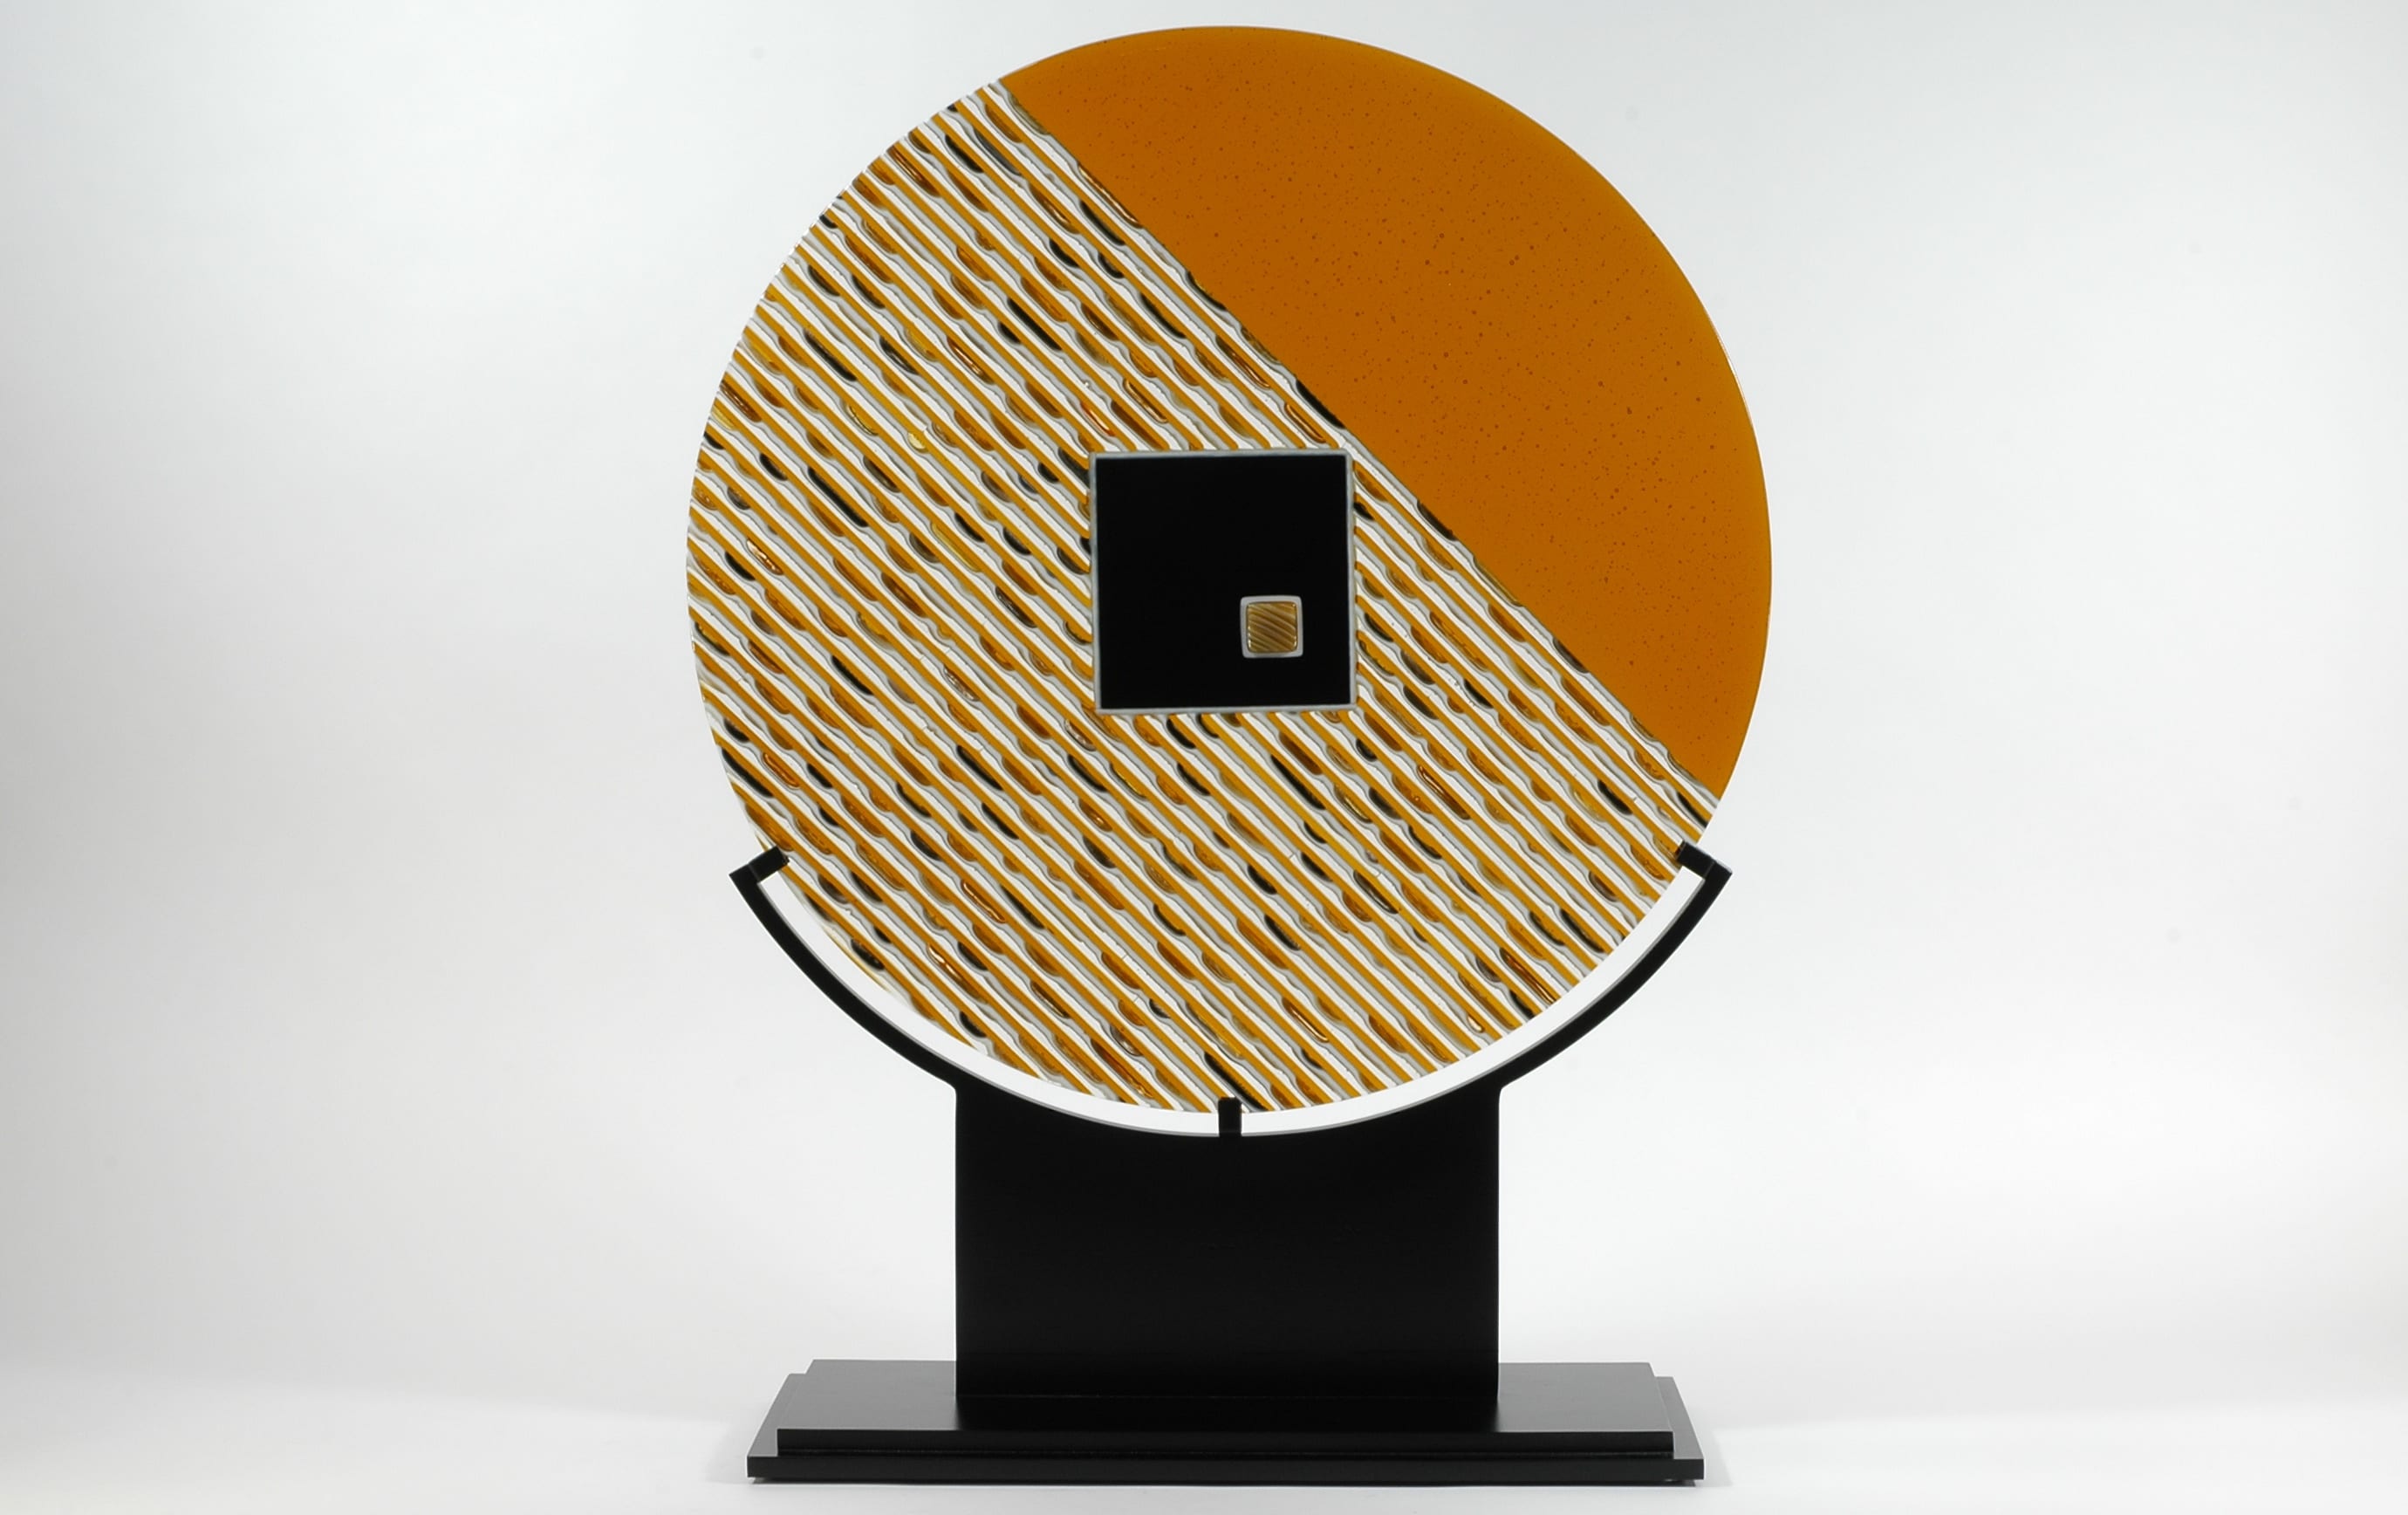
Cutting thick pieces and using the cut edge as the display side:
Sometimes the edges of fused glass are as interesting as the flat surfaces. Using the tile saw, a pre-fused slab can be cut into 3/8” wide strips, which can be rotated so the cut side is up; reassembled and fused again.


Conclusion
Many useful tools are needed for coldworking kilnformed glass. The three most useful are the wet belt sander, sandblaster, and tile saw The tile saw is a very valuable addition to the armamentarium of tools for the kilnformer, and I hope this article has given you enough basic information to purchase one, and begin using it.