
Shelf Preparation
Whatever kind of project you are fusing or slumping, it is important to have some kind of separator between your glass and the underlying shelf. This tutorial discusses some of the ways to successfully accomplish this.
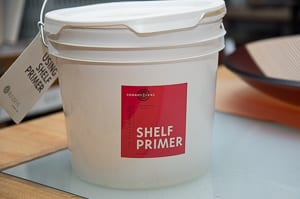
Shelf Primer
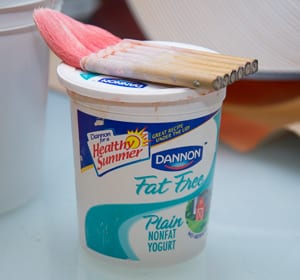
One of the most common ways to prevent the glass from sticking to the shelf is to coat the kiln shelf with shelf primer (also called shelf separator, or kiln wash). I have tried several brands, and prefer the Bullseye product called Bullseye Shelf Primer . To use this, you need to first scrape off any residual shelf primer, using a razor blade as you would to remove wallpaper from a wall. The shelf primer comes as a powder, which needs to be mixed with water. I mix it up until it has the consistency of whole milk, which is about a 1:5 ratio of powder to water. I use a plastic canister, like a large yogurt container, to mix and store this. It has a tendency to settle, so it has to be mixed frequently as you use it. Using a soft Chinese hake brush (or some other soft, natural bristle brush) apply four or five coats to the shelf, going a different direction with each application. After this is dry, if you want a really smooth bottom surface on your glass, options that artists use are to smooth it out with the palm of your hand, or to brush on some hot water.
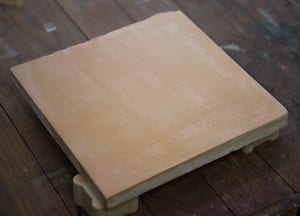
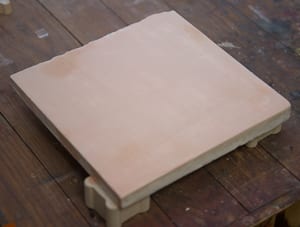
The shelf needs to dry before you can use it, unless you are only putting very small objects on the shelf. I usually let it air dry. But, if I am in a hurry, I will use a fan or hair dryer to hurry up the drying process. If there is moisture in the shelf, and it is trapped under the glass, you can get undesirable bubbles between the glass and the shelf. Bullseye shelf primer is dark pink when applied, and this turns to a light pink when dry – so you can easily tell when it is ready to use. Another advantage of this product, is that it turns white after firing – so you know if the shelf has been previously fired and needs to be re-primed.
A frequently asked question is whether or not the shelf has to be re-primed before each use. I scrape and re-prime before each full fuse firing. That may be unnecessary at times – but is the safest way to deal with this. Bullseye recommends reapplication after every firing over 1300F. Some artists have described refiring on the same shelf up to six times before re-priming. Others will add a new coat of primer to the shelf, without scraping. If you do this, the glass could stick to the shelf and crack the glass, or chip the shelf itself. A more common scenario is that the shelf primer sticks to the back of the glass very tenaciously, and is difficult to remove. If you are not firing to full fuse (e.g., a tack fuse or firepolish), it is more likely that you can get away with not re-priming the shelf. It is up to you how much risk you are willing to take with your valuable time and expensive glass, to avoid this mundane task.

The advantages of shelf primer are that you can get a very smooth bottom surface on your glass, it is relatively inexpensive, and it has no organic binders to create a haze on the glass. I find this last characteristic important when doing a firepolish. Disadvantages are that it requires time and effort to prepare the shelf, and may delay you if the shelf needs time to dry. It has a tendency to stick to the back of the glass when taken to full fuse, especially opalescent glass. If you are performing a complex assembly on the shelf, it can be hard not to get dust on your fingers and on the glass. The glass will pick up any indentations or imperfections on the kiln shelf, and emboss them on the back of the glass – so you need to be scrupulous about your shelf preparation if the bottom side of your piece is going to be visible. This also means, that if you draw on the shelf with a pencil to guide your layup – the pencil lines may show up on the back of the glass.
Refractory Paper
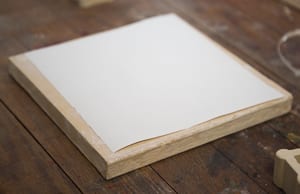
For basic fusing on a ceramic kiln shelf another frequently used option is to cover the shelf with a refractory paper, such as Thinfire ™, which is also a Bullseye product. There are other brands of paper, but I have only used Thinfire™ so that is what I will discuss here. But, I have no doubt that the other brands are good products as well. Refractory shelf paper comes in sheets, or on a large roll. It can be cut to the size you need for the particular project – the entire shelf does not have to be covered. In general, you want the smoother side of the paper facing the glass. Thinfire™ has printing on the non-smooth side to guide you. If you have paper without printing, slide you hand over the paper. Between the feel and the sound, one can usually discern the smooth side. You can place your glass directly on the paper and proceed directly to fusing. When done, remove the glass, and you can tip the shelf over into a trash can, and the used Thinfire™ paper will slide off; or you can vacuum it off. One does have to be careful of the dust, and a respirator is recommended. Some artists have described re-using the paper, but I have found it too fragile after firing to use again. It does have organic binders that burn off at around 800 F, which give a characteristic smell as the kilns get hot. For those of us who have been doing this for a long time, that smell creates a sense of accomplishment and anticipation!
The advantage of Thinfire™ is that there is no shelf preparation required, you can draw on it if you need to, and clean up is easy. It does not stick to the back of the fused glass and gives a very homogeneous, although slightly textured, surface. The disadvantages are that it is more expensive then shelf primer, and that as the binders burn off it can impart a haze to the edges of glass, particularly if the edges have been ground in preparation for firepolishing. If you expect extreme movement of the glass during fusing, it is possible that the paper will tear and expose the underlying kiln shelf. For this reason, I do not use this for extreme situations like an aperture pour.
Another product that can be used is fiber paper. This comes in various thicknesses, such as 1/16″ and 1/8″, and can be used in a similar fashion to Thinfire™ paper. In general, it will impart a coarser surface and is more expensive and should be reserved for particular applications, such as kiln carving.
I know some artists who coat fiber boards and papers with powdered alumina hydrate or whiting (calcium carbonate) as a separator. This can be textured on purpose if the artist desires.
In general, I use shelf primer for aperture pours, mesh melts, high fire fusing, firepolishing and creating small test pieces. I use Thinfire™ paper for complex assemblies and full fusing of most projects. I hope you find this helpful in figuring which product to use for your artwork.