By Steve Immerman
First published in Glass Craftsman, Winter 2011
Introduction
Being able to successfully cut glass is obviously a prerequisite to successful kilnformed glass-work.Perhaps it is not the most exotic topic, but understanding the basic tools and techniques and developing the necessary skills are fundamental to success. There are many different ways to cut glass, and I find I always learn new techniques from other artists. This article will discuss some of the common ways to cut 1/8” (3mm) fusible art glass, such as Bullseye, Uroboros or Spectrum. Thicker glass, highly textured glass, or window glass (float glass) may require other techniques that are slightly different from those needed to cut the art glass we kilnformers generally use.
The Theory Behind It
Although it is not absolutely necessary to understand all the physics behind the nature of glass, and how cutting affects the glass – having a mental model helps to dispel some of the mystery. Glass has been described as a “rigid liquid” or an “amorphous solid” – which sounds very oxymoronic. But, what that means is that it does not have a crystalline structure. The molecules do not line up in precise arrays, but instead are randomly situated with respect to one another—like a liquid. At very high temperatures glass does behave like a liquid, but at room temperature, it behaves like a solid. And, obviously, we will generally cut the glass at room temperature. The absence of a crystalline array of molecules means that there are no internal cleavage planes – so the strength is the same in all directions. What we want to accomplish when we “cut glass” is to control how, when, and where the glass breaks.
There are several simple tools for cutting glass. This article assumes one is using a basic rotary-wheel glass cutter, because for 1/8” glass that is usually all that is necessary. But there are other tools such as a tile saw, band saw, ring saw, and even a waterjet cutter that have distinct advantages in certain situations. I will cover selecting a glass cutter later on this article, but for now we will assume we are using a wheeled cutter with a carbide wheel, and that we run the wheel along the glass to create a “score line”. We then break the glass at that score line.
If you take a piece of glass and try to break it without first scoring it, it will seem quite strong and will resist breaking. It will bend a little, because the force you are applying is evenly applied all over the glass. But, at some point, if you continue to apply force – it will break. You will have no control over where it breaks, exactly when it breaks, what the shape of the break will be, or how many pieces it will break into. You will probably cut yourself as well.
However, if you score the glass first, it will break along the score line with considerably less force than was needed to break an un-scored piece of glass. When you score a sheet of glass, you are disrupting the surface of the glass, and creating a line of micro-fractures deep into the glass from the pressure concentrated by the edge of the wheel. The glass is now stressed at that point, and it will take very little external pressure to cause it to separate along the score line. Interestingly, a score line, if left alone long enough, will begin to repair itself. This is similar to you running your hand through water – the trough created by your hand rapidly fills in. Glass does this, but very, very slowly as demonstrated by photo-micrographs taken of a score line over a period of time.
Tools for Scoring the Glass
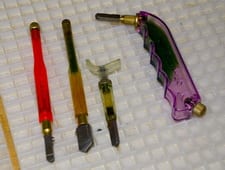
There are various kinds of glass cutters, but almost all have a carbide wheel in some sort of cutting head, attached to a handle. Some cutters are meant more for cutting straight lines, others for curves, and they are usually labeled as to their intended purpose. There is even one called a “tap wheel” that is designed to vibrate as it cuts, providing a deeper zone of microfractures. These are not the most expensive tools you will have in your shop, so it is worth getting a good quality cutter. Wheels from Toyo are readily available and are high quality.
The shape of the cutter handle is more of a personal preference. Cutter handles come with pencil shapes, “T” shapes, or “pistol grip” configurations. I personally prefer the Toyo Thomas Grip “T” shaped cutter, but I keep all three at my table, and during prolonged periods of cutting, I switch from one to another to prevent repetitive stress injury.
The other issue is whether it is necessary to score with a dry cutter, or have some sort of lubricant either in the cutter or on the glass. The reason for the lubricant is not only to lubricate the wheel, but to get into the score line to facilitate the subsequent break. I have always used a lubricant in my cutters, but I’ve heard others vehemently recommend cutting dry – and others who brush a liquid over their score line after scoring. I can’t say I have any data to support one side or the other. My guess is that for our purposes it doesn’t really matter. I think that you have to try a variety of ways and decide which works best for you.
Scoring the glass can be done on any flat surface, as long as it is free of particulate matter and completely flat. Many people use a cutting surface like the one in the Morton cutting system, because it is composed of a ½” lattice that allows the glass chips to fall away from the working surface. Others prefer using a tabletop covered with carpeting. A hard flat surface will need to be swept or vacuumed frequently to prevent glass chips from creating an uneven surface under your glass which can cause unwanted breakage and scratches.
Scoring Technique
The basic concept is that you should hold the cutter perpendicular to the glass, apply even pressure, and roll the cutter along your proposed score line – starting at one edge of the glass and ending at the other. For perfectly straight lines, running the cutter along a straight edged ruler or guide is necessary. Make sure to apply pressure all along the score line – especially at the beginning and at the end. It doesn’t matter if you run the cutter toward yourself, or away. Again, I’d suggest trying both, and doing what is comfortable for you. If you are following a pattern line on the glass it is usually better to score away from yourself so you can see the line and follow it precisely. You may find that the type of cutter you use and the length of the score line changes your mind about what is comfortable in a particular situation. The glass should be clean before scoring. It is easiest to cut the glass on the smoothest side because the cutter head will have equal contact with the surface of the glass – but it can be scored on either side.
It is said that you want to apply three to five pounds of pressure on the cutter – however in the studio it is almost impossible to actually know how much pressure you are applying. Applying too much or too little pressure will adversely affect the ability of the glass to break cleanly and accurately. This is something where practice helps. Unfortunately, different brands and different colors of glass will behave differently. I use Bullseye glass, and it is has become obvious to me that the harder opal glasses (white, or French Vanilla) require more pressure than softer glasses (black, or transparent). There is a distinctive and satisfying zzzzzst sound that the cutter makes as it scores the glass that you will learn to appreciate with time.
Breaking the Glass
After scoring the glass the next step is to break it along the score line. There are numerous ways to do this, and how you accomplish this will depend on the type of score line, the size of the glass pieces you are breaking, the tools at your disposal, and your comfort level with the various techniques. This article addresses straight lines and simple curves in 1/8” glass sheet. Circles, ovals, thicker glass, and tight inside curves have their own tools and techniques.
Interestingly, as opposed to most things that we cut in our lives, the location of the score line with respect to the edges makes a difference. In other words, it is just as easy to cut a piece of paper or wood in half, as it is to cut a small strip off the edge. This is not the case when cutting glass and there are a few interesting facts:
It is easier to get a clean break far from the edge of the glass than close to the edge. (in other words, it is difficult to break off a long, thin strip of glass and much easier to break off a wider strip)
When cutting narrow strips, it is easier to get clean breaks if you keep cutting the width of the strip in half, rather than trying to cut small strips off a large sheet.
As the width of the strip you want to cut approaches the thickness of the glass, getting a clean break becomes harder. It is not possible to cut a strip the same width or thinner than the thickness of the glass. Therefore, if you are cutting 1/8” thick glass, cutting and successfully breaking anything less than ¼” can be difficult.
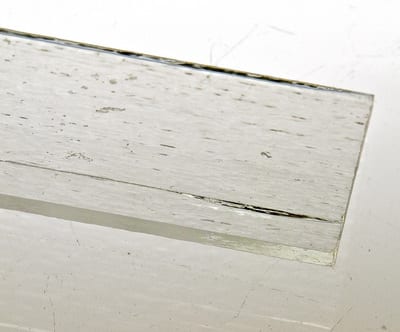
The general concept of breaking along the score line is to apply upward pressure underneath the score, and downward pressure on the rest of the glass. Before the actual “break” occurs, the score line must be “propagated”. This is best demonstrated on a sheet of transparent glass. Once a score line has been created, you may see areas where it appears that the glass has already separated below the score by virtue of the fact that you can see a crack with reflective surfaces – yet the glass has not yet separated into two pieces. If you turn the glass over on a soft surface (like a carpet or thick newspaper) so that the score line is in contact with that surface, and press firmly on the score line on the un-scored side of the glass, you can see this crack traveling along the score line. Once this crack has been propagated from one edge of the glass to the other, the glass is probably in two pieces already. In most situations, propagating the score line and breaking the glass seem to occur simultaneously. However in situations where you are cutting a complex curve or having trouble getting the glass to break easily, propagating the score first may be helpful. In addition to the method mentioned above, gently using running pliers, or tapping the un-scored side of the glass directly under and along the score line may work as well.
In most situations, you will not need to consciously propagate the score line as a separate step – and you can just proceed to simultaneously propagating and breaking. The most important aspect of this next step is safety. Your glass is now unstable because of the score line, and can fall apart when you least expect it. You also have to pay attention to what is going to happen to the two pieces of glass after they separate so they don’t fall and shatter or cut you. Whatever maneuver you choose, if you feel uncomfortable that you are going to expose your hands to an unprotected sharp edge in an uncontrolled fashion – find another way to accomplish the break.
Here are a few ways you can break the glass:
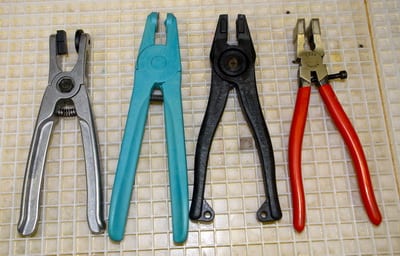
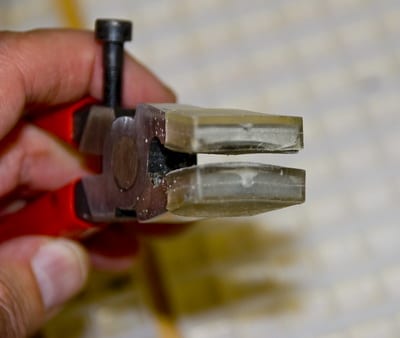
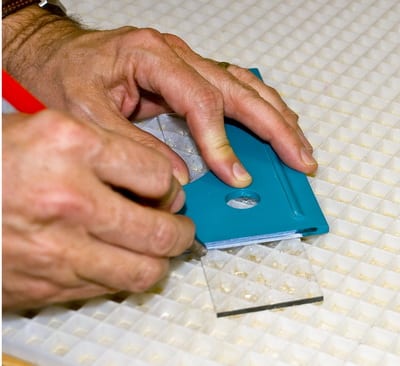
Use a running pliers applied parallel to the score line. These are designed to apply upward pressure on the score line, and downward pressure on the adjacent glass. For a long score line, you may want to apply the pliers very lightly at one end – just until you hear a faint click, then turn the glass around and apply pressure with the pliers at the other end to complete the break.
Turn the glass scored-side down on a soft surface and press on the un-scored side along the score line.
Align the score line with the edge of your work surface, and apply downward pressure on the edge of the glass overhanging the edge. Wearing protective gloves is a good idea when doing this.
Thin strips of glass can be broken crosswise into shorter pieces with a maneuver similar to breaking a pencil in half.
A cord, string, or mono-filament can be stretched across a flat surface, and the score line can be positioned over the cord. Pressure on both sides of the glass will cause it to crack on either side of the cord.
Use your hands to break the glass: grasp the glass on either side of the score line, thumbs on top and curled fingers underneath, and applying force down and out with your thumbs, and up with your curled fingers. Be sure to position your thumb and fingers so that they will not be cut when the glass separates.
Use two pairs of breaking pliers to break the glass, one on each side of the score line, with the jaws parallel to one another and parallel to the score line. Apply downward pressure to open up the break along the score line. This only works if the size of the glass being cut allows the pliers to almost touch each other.
Troubleshooting
Not everything always works out the way you want. Sometimes the glass just will not break as you expect. When that happens; there are a few things you can try.
Make sure that your cutter wheel is perpendicular to the glass in all directions.
Vary your pressure, using either greater or lesser to see which works best for that particular sheet of glass.
Make sure you are keeping even pressure on the cutting wheel at both the beginning and the end of your score.
If you are applying pressure and the glass is not breaking as you expect – stop. Flip the glass over and try cutting the other side of the glass, even if it is not as smooth as the side you were working on.
If as you are scoring the glass – it just doesn’t seem like you did it right – flip the glass over and try the other side. Do NOT go over a score line again on the same side of the glass. You will not improve the score, and may damage your cutter.
Try a different method of breaking the glass.
Consider whether your cutter has lost its sharpness, and it is time for a new cutter, or to replace the cutter head.
When you score a sheet of glass you start the score line at one end of the sheet and finish at the other. If you are applying running pliers at the “finish” end and it is not working, try the “start” end instead.
There are times, when a particular sheet of glass just doesn’t want to behave the way you expect. Try another sheet until you regain your technique.
Take a break. This just may not be your day for cutting glass.
Accuracy
One of the most frustrating problems can be inaccurate cutting. Here are a few tips that may help:
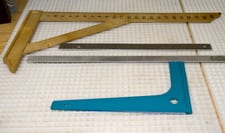
Very often we are cutting right angles to make squares or rectangles. A simple right angle tool is very helpful with this, and several are available with a ridge to allow the tool to rest along one side of the glass.
Mark where you are going to cut with a Sharpie© type marker, and making sure your cutting wheel is right on the mark.
Put cork backing on your straightedge tool to prevent slippage. Cork-backed rulers, or cork tape that you can put on your own ruler is available at many stained glass supply stores.
If you are using glass with a rolled edge, it is best to cut that edge off first using a right angle tool to create a perfect 90 degree angle on the sheet (“square off” the sheet).
The Morton System consists of a line of tools that help with cutting precise angles – and some people find this very helpful.
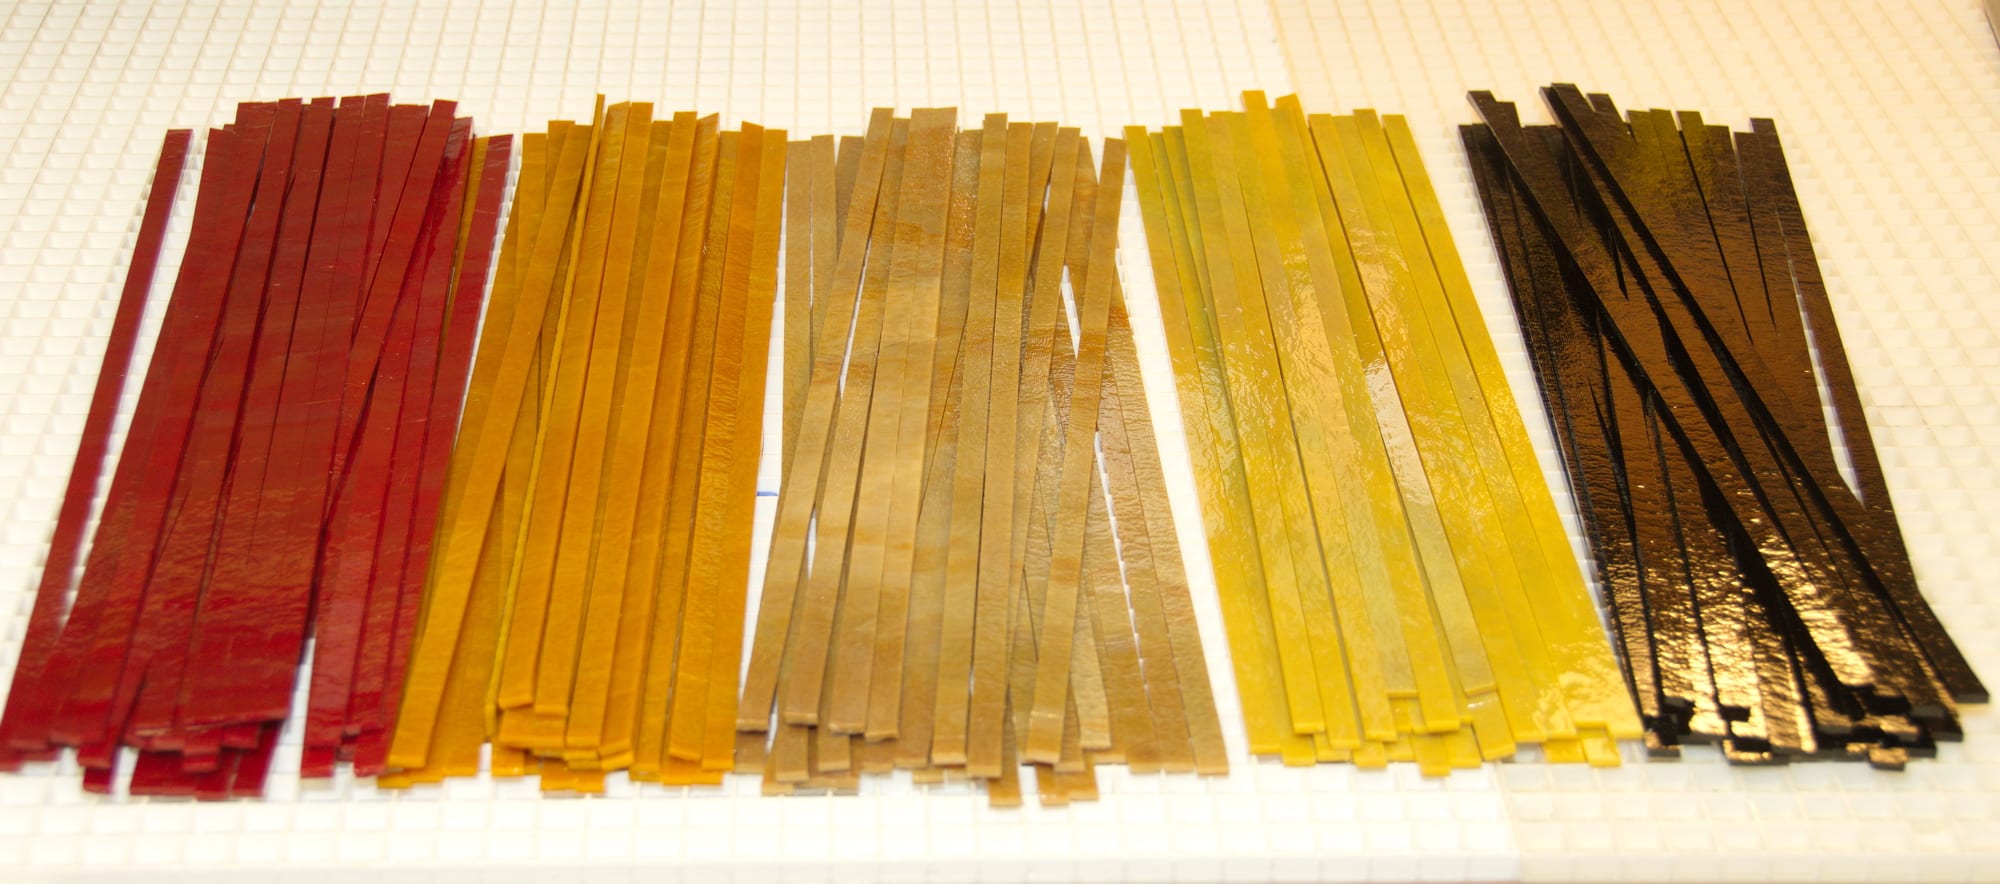
There are dedicated strip cutters that facilitate cutting many uniform strips.
Safety Issues
You should always use eye protection when dealing with glass. Small splinters can go flying through the air, and you definitely don’t want them getting in your eyes. Do not touch or rub your eyes while working with glass.
Never hold glass by the cut edge – but rather by holding the flat surfaces.
Always be aware of what will happen to the glass after it is cut – and if it is going to fall – let it, rather than trying to catch it.Always wear shoes with covered toes when working with glass.
When we cut glass we want a squared off edge – but often there is an area where the glass breaks in a sharp bevel, much like the edge of a razor blade. These can be extremely sharp – and should be ground off immediately or you risk cutting yourself. If you have a triangular scrap with a very sharp point, you should grind or break that point off – or you risk stabbing yourself.
I find that most cuts occur when when reaching into the glass rack or scrap bin trying to remove a particular piece, or putting sheets of glass into the racks. Protective gloves should be worn at those times.
If you get a small glass splinter, try applying a piece of adhesive tape over the splinter and then removing the tape, with hopes that it brings the splinter with it. You can purchase a “splinter removal kit” with very fine tweezers that are excellent for removing deeply embedded splinters.
Conclusion
I hope this article has helped the beginners, and maybe provided an interesting fact or two for the experts. I wish you safe and accurate cutting!
If you are a kiln glass artist, and are interested in one of the best and most cost effective methods of learning both basic and advanced techniques, the Bullseye Kiln-glass Education Online video lessons are fantastic. Click on this link to see the free ones, and consider signing up for the rest.
