About Glass Kilns
If you become serious about glass fusing, you are going to want to buy your own kiln. Fortunately, there are many, many models available, but it makes choosing difficult. It helps if you have some guidance in what to purchase. Of course, there are many opinions about this, and this page will describe my preferences. But, I will point out the main factors to consider.
Shape
The main shapes are square, hexagonal, and rectangular. Often the rectangular ones have curved ends, more like a bathtub. In general, square kilns have a more useful shape. Hexagonal ones are good for fusing circular items, but won’t let you do as large a square item. The bathtub shapes are good for many smaller items, but not single large items because they usually require three shelves, and there are seams, unless you find a way to make a custom shaped shelf.
Configuration
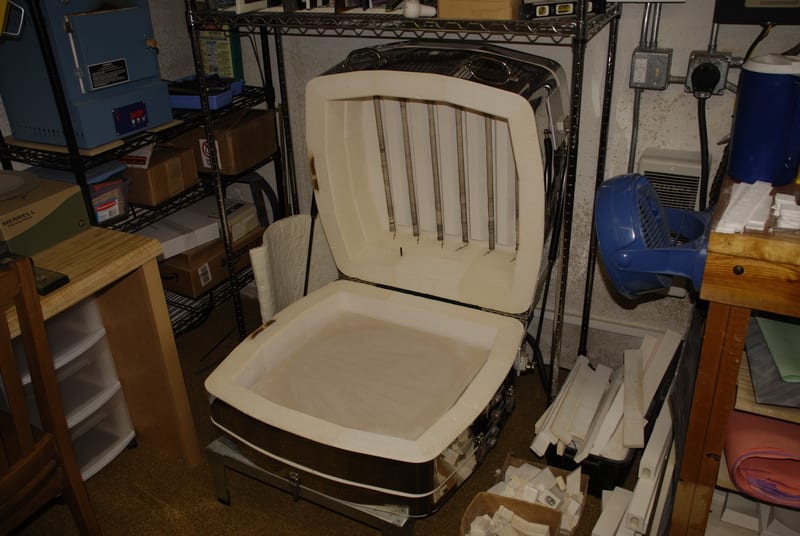
The three basic shapes of kilns are front loading (like a microwave oven), top loading, or clamshell. The clamshell kiln has a shelf that is very easy to access, and a large box-like lid that covers it when firing. It is easier to construct a piece directly within a clamshell kiln or move something from your work-table into the kiln. Both top loading and clamshell allow you to view your piece from above before you start firing, which is very useful if you want to make sure everything looks OK and nothing has moved, before you start the firing cycle.
Kiln Dimensions
Although these kilns seem very large when you look at the dimensions, sometimes it can be deceiving. For example, I have a 22″ kiln. However, the shelf is slightly smaller, at 21 5/8″ x 21 5/8″. If I want to make a circular piece that is thicker than 1/4″ I have to surround the glass with dams of some sort. Depending on what you have available for dams, they may need an inch and a half or so of room in all directions (unless you have a custom made steel ring, and fuse inside it). So, that may decrease the size of your maximum circle by about 3″, leaving with you with the ability to make a maximum circle of about 18 1/2″. As the kiln gets smaller, these differences become even more significant, percentage wise. So, don’t anticipate that you can easily make a 14″ piece in a 14″ kiln.
Choosing the size of the kiln, which dictates the maximum size of the project you can create also has to fit in with all your other equipment. For example, I have a 21 5/8″ shelf in my kiln. Anything I make will fit into my sandblaster, will fit on my tile saw, will fit on my 24″ lap grinder, will fit in the sink I use to wash the glass, and will not be so heavy that I can’t lift it. Of course, if your goal is production of many small items, you may want a larger kiln for that reason.
The height of the kiln is also very important, mostly when slumping. The deeper the slumping mold, the more height it requires in the kiln, and with a kiln that only has, for example, 6 1/2″ in height a mold that is 5″ high will have the glass almost touching the ceiling. Nine inches in height is very useful. If you are planning to do aperture pours, 11″ is even better.
Often, kilns have the option of a quartz viewing window. I don’t think that these are a particularly useful feature. You usually can’t really see things well enough through these little windows to make them worthwhile, and there is usually no harm in taking a quick peek when the glass is over 1000 F, but some people love them.
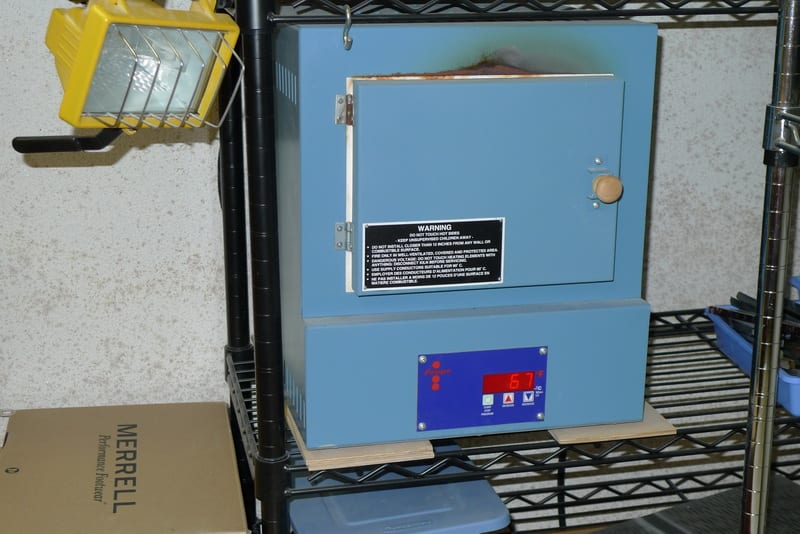
Element Placement
Glass kilns have the most critical elements in the ceiling of the kiln. This is to allow even heating throughout the glass, which is usually laid flat and horizontal. Ceramic kilns have their elements on the sides of the kiln, which is why they are not optimal for glass fusing. You can also get kilns with the elements on the ceiling, sides and door. This will provide more even heat for objects that are using more of the vertical space in the kiln, like a deep slump or an aperture pour. Although at times they are helpful, they are not usually a necessity for basic fusing. For large kilns, firing thick pieces, evenness of heating and annealing is very important, the those professional kilns may have elements in the floor as well.
One interesting fact to know is that as a kiln heats up, at first most of the heat is transferred to the glass by heating the air in the kiln. However, over 1150 F, most of the heat is transferred to the glass by direct infra-red radiation from the coils. Different kilns will transfer heat to the glass with a different degree of efficiency. I have two large kilns, and to accomplish the same thing in one kiln vs. the other requires a 30-40 degree difference in how I program the kiln. If you have a mentor, who is going to help you with firing schedules, having the same kiln as they do will allow easier transfer of information from their studio to yours.
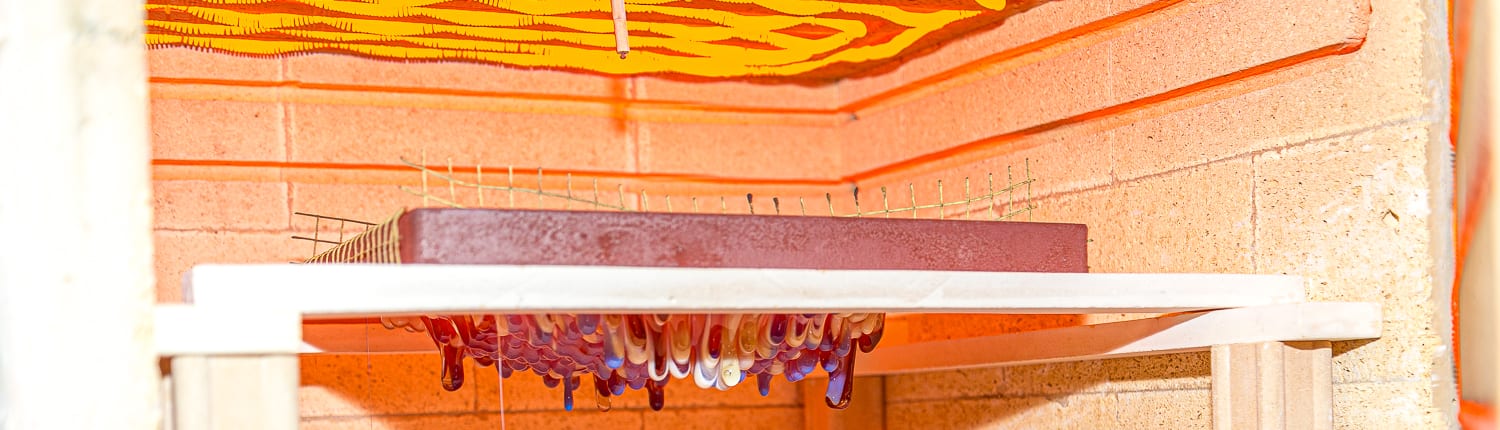
Also on the subject of elements, one of the problems with the type of heating elements that are recessed into grooves in the ceiling brick, is that over time small particles of the brick can precipitate down onto the glass as the elements expand and contract against the brick during the heating cycle. This can be very frustrating, especially because (by Murphy’s Law) any particle that falls, will fall in the most noticeable spot on your project! A solution to this is to get a kiln where the elements are not embedded in firebrick, or are totally embedded in a “fiber ceiling”. In those cases, this is not an issue, and I strongly recommend looking for this feature. If you look at the image of the clamshell kiln above, the elements are below the ceiling and not embedded in firebrick, and does not have this problem.
Controller
In the pre-computer era, kilns had nothing but an infinite temperature dial, and the fuser had to constantly adjust this dial during the firing cycle to accomplish the complex firing cycle. This required constant attendance, and quite a degree in variability from one firing to another. Fortunately, we live in a digital era, and most kilns come with computer controllers. These allow you to “set it and forget it” (most of the time). When firing a kiln you will need to tell the controller to heat up at certain ramp speeds, reach certain target temperatures, hold at certain temperatures, and cool at certain ramp speeds. Each set of commands (ramp-temperature-hold) is called a “segment”. In general, seven segments will handle most situations.
The controllers also have the ability to save your programs. This is a nice feature, so you can save your usual program for fusing, slumping, fire-polishing, etc. When you buy a kiln, be sure you look at the controller and ascertain how many “programs” it will store, and how many “segments” each program can have.
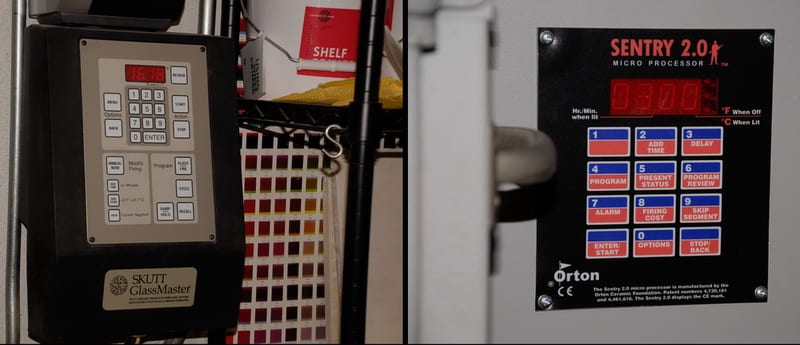
Another characteristic of the controllers is the number of “keys” or keypad buttons it has. Two common kinds are “3 key controllers” and “12 key controllers”. The 12 key controller will have a full keypad, like a phone dialer. The 3 key controller will have three buttons, two of which are “up” and “down”, like those annoying alarm clocks that you have to program by hitting up and down to key in the time you want. They will perform similar functions, but the the 12 key controller will be much easier to use, and these usually have more programs and segments available. It’s usually worth the upgrade if available.
Some kilns come with basic programs built in to the controller. I don’t recommend using these. It is much better to figure out your own programs, keep careful notes, and modify them as needed.
Size, Weight, and Electrical Hookup
The smaller kilns are not cheap, and are very limiting. But, have the advantage of not taking up much room, and being able to plug into 120v rather than 220v, cheaper to ship, and easier to move around. If you order a kiln that requires 220v power, make sure you know what type of plug it has, and have your location properly wired for 220 with the proper receptacle for the plug. Also, make sure you follow all fire codes regarding kiln placement and surrounding materials. If you are limited for space, make sure that you take into account the space needed for the lid to open, and the fact that you usually need at least 12″ between the kiln and any flammable surface.
Accessories
You will need to make sure that you get an appropriately sized kiln shelf. It is extremely important that the shelf you purchase be specifically made for glass fusing. Mullite clay shelves are very common, but they have to be absolutely flat. Any dips or imperfections will be the cause of bubbles. Bullseye guarantees that their shelves are flat, and are the best. Although you may be tempted to get your shelf from the kiln manufacturer, you may get a bad shelf, and it will take much time, effort and anguish to figure out the problem and order a new shelf. Best to get the best shelf from the start.
You may also need a kiln stand of some sort, or you will be bending over onto the floor to work with the kiln. Make sure you get one when you order the kiln.
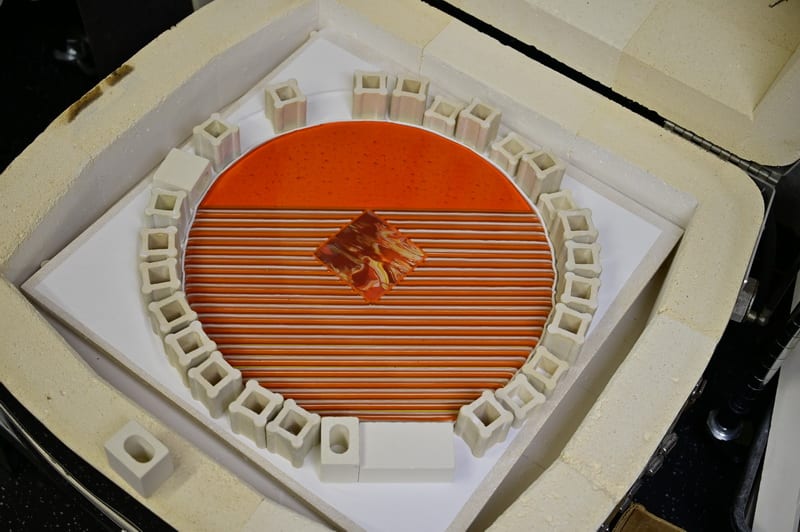
Using kiln furniture as dams for a 3/8″ thick piece.
You will also need some sort of “kiln furniture”. These are little ceramic blocks to put under your shelf, to raise it up off the kiln floor, raise up certain molds or drop-rings, and to use as dams. When I bought my first kiln, I purchased three boxes of kiln furniture (2″, 1″ and 1/2″) and when they arrived, I wondered why in the world anyone would need so many. But, I have found myself using almost all of them at times. So, these are good to have around.
Installation
Just a couple of things to mention here, aside from the safety issues. The kiln will need to be leveled, and then the shelf inserted, and you need to make sure it is level also. It also makes sense to apply several generous coats of kilnwash (shelf primer, shelf separator) to the floor and sides of the kiln, just in case you have some sort of disaster where glass drips off the shelf or the shelf cracks. This will prevent the molten glass from damaging the kiln.
I have also found it very useful to have a small fan nearby to help cool off the kiln during the final stages of the firing (notice the blue fan in the image of the clamshell kiln). Since the rate of cooling occurs proportional to the difference in temperature between the kiln and the ambient room temperature, it will cool very quickly from 1500F to 1000F, but will take a long time to go from 300F to 68F. A fan will help dissipate the heat at the stage where the kiln has turned off and is being allowed to cool at its own rate. It is definitely safe to do this with the kiln closed, and usually safe if it is cracked open a bit, but all this depends on the size and thermal mass of your kiln.
Having an exhaust fan in the room with the kiln is nice, but not absolutely necessary. Glass itself does not have any odor or create any particulates when firing. If you use refractory materials, like Thinfire paper, there are organic binders that burn off around 800F and do have a smell, but it is not dangerous. If you are using various enamels, adhesives,or metals in the kiln, it is possible that there may be noxious fumes that you would prefer to vent outside.
Recommendations
In general, I recognize three categories of kilns: big and small and giant. We’re not going to talk about giant kilns here – that is for professionals who already know what they need. But, for a beginner buying their first kiln, you need to decide between small (less than 20″) and large (over 20″). This may boil down to budgetary considerations, space requirements, or to the uncertainty regarding how much time and effort you are going to put into this endeavor.
With any of these kilns, the purchase price is not the whole story on cost. You also have to calculate shipping, electrical hookup, accessories, site preparation, and possibly even movers to bring these big, heavy appliances into your workshop. In general, the cost of electricity to fire these is not a huge expense.
There are many excellent companies making glass kilns now (this wasn’t always the case). My personal experiences have been with Skutt and Paragon, but Olympic, Jen-Ken, and Evenheat are other popular brands. My personal favorite for an all-round glass fusing kiln that will satisfy you for a long time is the Skutt GM22CS clamshell kiln.
It is possible to very quickly find that the smaller kilns won’t do what you want. The toughest decision is whether to get a small beginner kiln, or a more substantial one right at the start, and I can’t help with that. However, having more than one kiln can come in handy, and having a smaller kiln is good for making small test pieces without using up the energy needed for a large kiln, and tying up the larger kiln which may be needed for more substantial projects. However, if you quickly outgrow a smaller kiln, there is usually a good market for selling it used and trading up.
If you are a kiln glass artist, and are interested in one of the best and most cost effective methods of learning both basic and advanced techniques, the Bullseye Kiln-glass Education Online video lessons are fantastic. Click on this link to see the free ones, and consider signing up for the rest.